Pages

Showing posts with label inexpensive. Show all posts

Wednesday, February 13, 2013

Chalkboard bottles


With the holidays passed, we seemed to have a lot of wine and beer bottles laying around. I cleaned them out and had them in a cabinet because I knew they'd come in handy. While I was painting my chalkboard frame, I figured what better time then to paint the bottles the same.

I let the bottles soak in water to get the labels off. They mostly all came off besides a couple left some sticky residue that wiped right off. I let them sit out to dry while I did some other stuff. 


I used the same roller as I was using for my picture frame chalkboard and did three coats on each bottle. Because they are dark glass, they didn't take as many coats but if you have a clear glass, it may require more. Make sure the paint is completely dry in between coats or it'll clump and streak.

After they were all dry, I decided LOVE is good to write on them since Valentines Day is next month.
A home above our kitchen cabinet is a perfect home for it since its pretty bare up there!
Do you have lots of bottles floating around after the holidays? What a great, inexpensive way to repurpose them.


Monday, February 11, 2013

Chalkboard picture frame


When we moved into our new house, I bought this console table from Target and really like it. It matches our dining room table perfectly and I had a great envision of decorating it cute for the holidays or with pretty decor pieces. Then I realized quickly that with two toddlers, that's not practical unless I want stuff broken. I usually have a couple small things in the center of the table that little hands can't reach and nothing underneath since my boys use that as a place to park their cars. But it is so boring looking! It needs something big!
Enter Goodwill (I go there a lot), a $10 ugly gold frame, chalkboard paint and left over white paint from my tv console and we have a chalkboard frame.


I didn't get a before picture of the frame because I am always in a hurry during nap time to get things done but, it was ugly gold. I just did a rough sand and paint it with three coats of the white. On the detailed parts, I used the end of the brush to get into the small crevices to make sure all the detail showed through.

In between coats, I used my chalkboard paint and did three coats of that on the glass from the picture frames. Make sure in between coats your paint dries all the way or it'll become streaky. (I don't think that's an actual word but you get what I mean.)

Once they are dry, put it back together and there is your chalkboard picture frame.


Sunday, February 10, 2013

Oil Pan Magnet Board

I am a stay at home mom and am always trying to find new ways to entertain my boys. On a recent trip to Arizona, Kristy gifted us with Leap Frog magnet letter sets and we already had the animal set as a birthday present from Jeannie but...I don't want all that on my refrigerator or dishwasher (stepping on toys is not fun) So, I copied Jeannie's post using a oil drip pan as a magnet board/chalkboard for her little man but, decided to skip the chalkboard part since we already have a chalkboard table.

I believe our large drip pan from Walmart was around $10. I bought the tin containers from the dollar section at Target and already owned the shelf. I topped it off with a Dr Suess printable.


I used the Velcro Command Strips to hang the oil pan and it is holding up pretty good.

My boys love sitting and playing with it. They are a little young for words but we work with our letters and sounds.

Quite the success if you ask me!


Friday, February 8, 2013

One drawer at a time


You are about to notice a trend with my posts.  We are adopting and are in the waiting part of the process which has made me go into a bit of an organizing/purging fit.


Today's task was super simple and only took me about ten minutes from start to finish.  We have this cute little table in our entry way and hubs and I each have a drawer to keep stuff.


My drawer has gotten cluttered and full of all kinds of junk that didn't belong there.


First step, trip the dollar store. The nice people at the store are going to get sick of seeing me,  lots of my recent projects have included Dollar Tree storage. These two little sets were on an end cap and I didn't actually know what I was going to use them for when I grabbed them.


I cleaned out my drawer and these fit great! 


Now the fun part, putting back only what needs to be in the drawer.  Starting at the upper left and going clockwise. 

1. Some of my Scentsy smells and my extra phone screen protectors. 
 2. More Scentsy smells
3. Battery charger (I'm trying to switch over to all rechargeable because we go through them so quickly with little man's toys)
4. Batteries
5. Chap sticks
6. Gift cards (these get misplaced easily in our house)
7. Hand cream


The battery charger cord is run through a hole in the back and plugged in behind the table. 


Now I feel kind of guilty though.  I may need to make a trip back to the dollar store to get some bins for hubs drawer...


One last look at the organizational goodness...sigh, this makes me happy.


XOXOXO
Jeannie

Friday, November 30, 2012

DIY Canvas Quote

My boys' bedroom walls are bare. I have tons of ideas I want to do like a fabric tree or tissue paper Pom poms from the ceiling like in their original nursery but I know soon they will be out of theirs cribs :( and into toddler beds which means big boy bedding. (Makes me sad even thinking about toddler beds. What happened to my babies?) And by then, the room decor will change.

I decided a canvas would be cute and I happened to have all the supplies on hand. I painted a canvas with some orange acrylic paint. I did two coats.

For the quote...you see, 19 months ago, Jeannie and Amanda came to meet my boys. Amanda is a great photographer and took some newborn pictures for me. This is one of them:

Perfect, right? :)

Now, if you are fancy and have a circut or silhouette  obviously use those for your stickers...or if you are like me and have that on your wish list *hint,hint*, you can stickers. I have a million scrapbooking stickers and they worked perfect. To make sure I was going in a straight line, I used a piece of paper as my guide.


All done with the quote...then I went outside and spray painted it with blue spray paint. After it dried, pull off the letters and ta-da! Simple. Quick. Inexpensive. And so cute! The walls are still pretty bare but it is a work in progress! 


-Sabrina

Sunday, November 18, 2012

Thanksgiving care package


We have all had friends or family (or even ourselves) that have been in the hospital during holidays. I find myself asking "what can I do to help?".  I am obviously not going to do anything to actually help as I have no medical background, but I want to do something, something to show them that they are in my thoughts and prayers. I decided this Thanksgiving to send a care package to my family that has been relocated for some time while my husband's cousin recovers.

I mentioned in my previous post that my husband had been traveling back and forth to Spokane to see his cousin that is in the CICU there. Back in July, Joe went in for a heart surgery to repair his valves. He is in his early 30's and his father had just breezed through a very similar heart surgery and recovery, so we all thought Joe would be in and out of surgery with time to start recovering before his first niece was born at the beginning of August. Things with the surgery didn't go as planned, the doctor here in Alaska didn't expect his heart to have so much damage. To make a very, very long story shorter, he was flown via emergency life-flight to Spokane along with his mom. Since being in Spokane, he has had multiple steps forward followed by terrifying steps backwards. He had a mechanical valve put in his heart because his heart wasn't working, they planned to put him on the heart transplant list as soon as his other organs started coming back on board. We all can only imagine how life altering this could be but we didn't care, our Joe is alive.

Then a miracle happened...his own heart started working again! Even the doctors don't understand how or why but Joe's heart began beating on its own. After a few more scary surgeries, I am happy to report that Joe is on the recovery route again. His own doctor, his biggest cheerleader, says the laws of physics do not apply with in Joe's room in the CICU. More than once during this whole time period we have been able to say, "it's a miracle" or "the power of prayer is amazing!". We continue to pray for his organs to come back on board 100%, and he has a long road ahead of him but we all believe he is headed in the right direction! If you are a praying person, continued prayer for Joe's healing process would be greatly appreciated!!

Anyway, on to the care package. I knew that the family that is with Joe over the holiday would be missing their traditional Hebert Thanksgiving food (oh my goodness, I could go on and on about this family's cooking!). Since I can't pack up Granny's rice dressing or turkey to send to them, I went back to what I know. Desserts. Our family is a fan of fudge, chocolate pies, chocolate cakes...basically most things chocolate. Fudge seemed like the logical choice to send to Washington. So I made the fudge.

 
I gathered other items to add to the box.
 
 
The baby clothes are for Joe's niece who is just 3 1/2 months old. How could I resist these little turkey clothes? There is a little turkey on the bum of the pants...adorable!


I got these free printables from Pizzazzerie to add to the box. I love the coloring of the printables but also the verse. Our family has so much to be thankful for any normal year, but this year even more!
 
 
Using a large flat rate shipping box, I started packing. The fudge is the heaviest and largest, there is some pumpkin bread and chocolate covered pretzels in bags (with raffia to match the printables of course).
 
 
I layered in a box of black tea, more chocolates, the baby clothes (wrapped in tissue), and a card for the family and one for Joe.
 
 
I put the large printable on last so it will be the first thing they see when they open the box.
 
 
This is just a small, inexpensive way of sending some love (in chocolate form) from afar. We love and miss our family dearly! Next Thanksgiving we will be back together again!
 
Happy Thanksgiving everyone!
-Amanda


Friday, November 16, 2012

Burlap Art


Don't you love it?!  The walls in our half bath were pretty empty and it's always bothered me.


Hobby Lobby had a set of two of these canvases for around seven dollars.  I didn't really have a plan when I bought them but figured one out pretty quick.


I had some burlap already because I stocked up before it was officially fall season when it would be hard to find.  I am a huge fan of this method to cut burlap when you need a straight line.  Measure to where you want it cut, snip it about an inch,


pull one of the threads in that snip and start pulling.  You will be able to pull that one thread all the way out


leaving you a line as a guide so you can cut with scissors and be sure its straight.


I cut my burlap a little bigger than the canvases.
 

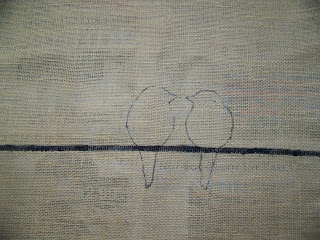
I laid out four pieces of contact paper leaving a small line open where I wanted to paint the wire.  I used fabric paint for this but because the paint doesn't need to be flexible when dry I probably could have used anything.


Here it is with the wire done.


I found a bird online that I liked and printed and traced it onto paper.  I used a sharpie to trace around my stencil.


I wanted them slightly different so I just made the second bird a little shorter and fluffier when tracing and also changed the tail feathers slightly.


Painted inside the sharpie lines and let it dry.


I knew I wanted the words in the upper corner and was worried that they wouldn't be straight or positioned wrong so I went ahead and stapled the burlap to the canvases before painting the words on.


I used my silhouette to cut out the words on the contact paper.


I went back over the words with the black sharpie to touch up areas that were to light.


One more look at the finished project.


 Jeannie