Pages

Showing posts with label craft. Show all posts

Monday, February 4, 2013

Felt Valentines Wreath


I don't know about you but I love Valentine's day. We don't usually do much for it but I really wanted to decorate. My goal this year is to have a wreath for every holiday (even though B says Valentine's Day is not a holiday). I found a lot of great ideas on Pinterest but really liked this one with the felt heart.

I could not find a heart shaped wreath anywhere. I went to three craft stores with no luck so I used a round one I had here.

I bought a yard of red felt for $4.99 at Joann's (then used a 50% off fabric coupon) and a box of push pins.

B and I turned on a movie and the project began. I used a cup as my guide and traced lots of circles (folding your fabric in half and cutting two at once cuts down some of the cutting). I cut and I cut and then I cut some more and then when I thought I was done, I cut more. Seriously. You need a lot of circles. I should have counted but it was a lot.

After you are done cutting, fold a circle in half and then quarter. Use your push pin and put it through the point then put it the styrofoam wreath. Repeat this process over and over and over again until no styrofoam is showing. You don't have to do the back since that is against the door.

I used some Valentines Day ribbon I had to hang it and I just love it. You can easily change out the ribbon and use it for Christmas too. I finished just as the movie finished so it took a couple hours but well worth it!

(Sorry for the lack of pictures...they accidentally got deleted while attempted to write this blog and take care of my crazies aka toddlers :) But the link gives a great tutorial.)


-Sabrina

Friday, November 16, 2012

Burlap Art


Don't you love it?!  The walls in our half bath were pretty empty and it's always bothered me.


Hobby Lobby had a set of two of these canvases for around seven dollars.  I didn't really have a plan when I bought them but figured one out pretty quick.


I had some burlap already because I stocked up before it was officially fall season when it would be hard to find.  I am a huge fan of this method to cut burlap when you need a straight line.  Measure to where you want it cut, snip it about an inch,


pull one of the threads in that snip and start pulling.  You will be able to pull that one thread all the way out


leaving you a line as a guide so you can cut with scissors and be sure its straight.


I cut my burlap a little bigger than the canvases.
 

I laid out four pieces of contact paper leaving a small line open where I wanted to paint the wire.  I used fabric paint for this but because the paint doesn't need to be flexible when dry I probably could have used anything.


Here it is with the wire done.


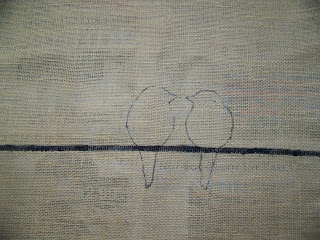
I found a bird online that I liked and printed and traced it onto paper.  I used a sharpie to trace around my stencil.


I wanted them slightly different so I just made the second bird a little shorter and fluffier when tracing and also changed the tail feathers slightly.


Painted inside the sharpie lines and let it dry.


I knew I wanted the words in the upper corner and was worried that they wouldn't be straight or positioned wrong so I went ahead and stapled the burlap to the canvases before painting the words on.


I used my silhouette to cut out the words on the contact paper.


I went back over the words with the black sharpie to touch up areas that were to light.


One more look at the finished project.


 Jeannie

Wednesday, March 28, 2012

Craft Supply Storage...did I metion that it was free!

Something you should know about me, I have two addictions 1. Organizing, I love it!  Much to hubs dismay I can always find something to organize in our house so things are always moving and changing.


2. Is this Chai Tea mix.  I don't drink coffee or soda and I've always been an ice water girl who avoids caffeine.  That is, until I decided to try this tea and now I'm hooked.  I faithfully have a cup in the morning and usually a cup during HB's nap.  I wish I had thought up this craft earlier because I've already tossed a bunch into the recycle bin.


So, I didn't have anything specific in mind once I decided to save them but it hit me that I am in desperate need of organization on my craft room shelves and these were sitting empty on those same shelves waiting to be used.

Once I realized what purpose they could serve me I washed them out with a soapy sponge.  These are the same material as a pringles can so I think getting them to wet would ruin them.  I thought that I would be using scrapbook paper to cover them but look how pretty and shiny they are once the label is off.


Next step, labels!   Labels fall under the category of organizing and it makes me down right giddy to get to label something.  I already had some chalkboard vinyl that I got off of Pick Your Plum that was just sitting and waiting for the perfect project.  I used my silhouette to cut out a sheet of these oval labels and stuck them on. 

Please don't feel that you need a silhouette to do a project like this because I haven't had mine for very long and I traced and cut lots of projects like this by hand before I had one.


They are cute, but didn't look finished to me.  I took some nail heads that I bought at Lowe's, by the eye hooks, and used two sets of pliers to bend the nail part back and forth until it came off.


Hot glued those suckers on and called it good!


Now I need to buy some of those chalkboard markers I've read about.  Brighter colors and easier to write with.  I adore how this project turned out, it didn't cost me anything and gave me more excuses to drink my chai.

Wednesday, March 21, 2012

Lemons into Lemonade...or Something Like That

OK, I messed up.  I was watching a friends little guy for her and didnt' think anything of putting him in Bree's room for his nap.  It never occurred to me that A. she had scissors in her room or that B. this little guy would find them on her desk and use them to cut up her pillow cases instead of sleeping.  I was seriously shocked when we discovered the mutilated pillow cases. 


Luckily he made his cuts on the closed end of the pillow cases so I was able to use a lot of the fabric for this project.


Poor Bree just got his bedding set from her Grandparents.


Within minutes of finding the pillow cases in this condition I had a solution in my mind.  First step, buy new white pillow cases.
Disclaimer: I am self taught when it comes to sewing.  I am sure there are many, many better ways to do this project but this is what I came up with.


I used my rotary blade to cut the open end of the pillow cases off at the seam.


With the piece I was sewing on I gave it a 1/4" of excess fabric past the seam.


See where I'm going with this yet?


Turn the trim piece inside out and pin at the right sides of the trim and pillow case together.


Pretty easy and quick project.


Still matches the sheets, but you know I didnt' stop there.


I cut a piece of the old pillow cases out just big enough to fit two letter a's for her name (Bree is a nickname).

Ironed on some wonder under and traced my a's on backwards so that when I put them on the new pillow cases the a would face the right way.


Cut out your letters, still with me?


Remove the paper backing (I've totally forgotten this step before and its no fun) and iron to the center of your pillow cases.


I did a straight stitch around the a's to keep them secure and because I like how it looks.


Finished!


I love how they turned out!  And now I know to check Bree's room for scissors but will probably just put extra kiddo's in our room where I know there isn't anything they can get into...live and learn.