Pages

Showing posts with label tutorial. Show all posts

Friday, November 16, 2012

Burlap Art


Don't you love it?!  The walls in our half bath were pretty empty and it's always bothered me.


Hobby Lobby had a set of two of these canvases for around seven dollars.  I didn't really have a plan when I bought them but figured one out pretty quick.


I had some burlap already because I stocked up before it was officially fall season when it would be hard to find.  I am a huge fan of this method to cut burlap when you need a straight line.  Measure to where you want it cut, snip it about an inch,


pull one of the threads in that snip and start pulling.  You will be able to pull that one thread all the way out


leaving you a line as a guide so you can cut with scissors and be sure its straight.


I cut my burlap a little bigger than the canvases.
 

I laid out four pieces of contact paper leaving a small line open where I wanted to paint the wire.  I used fabric paint for this but because the paint doesn't need to be flexible when dry I probably could have used anything.


Here it is with the wire done.


I found a bird online that I liked and printed and traced it onto paper.  I used a sharpie to trace around my stencil.


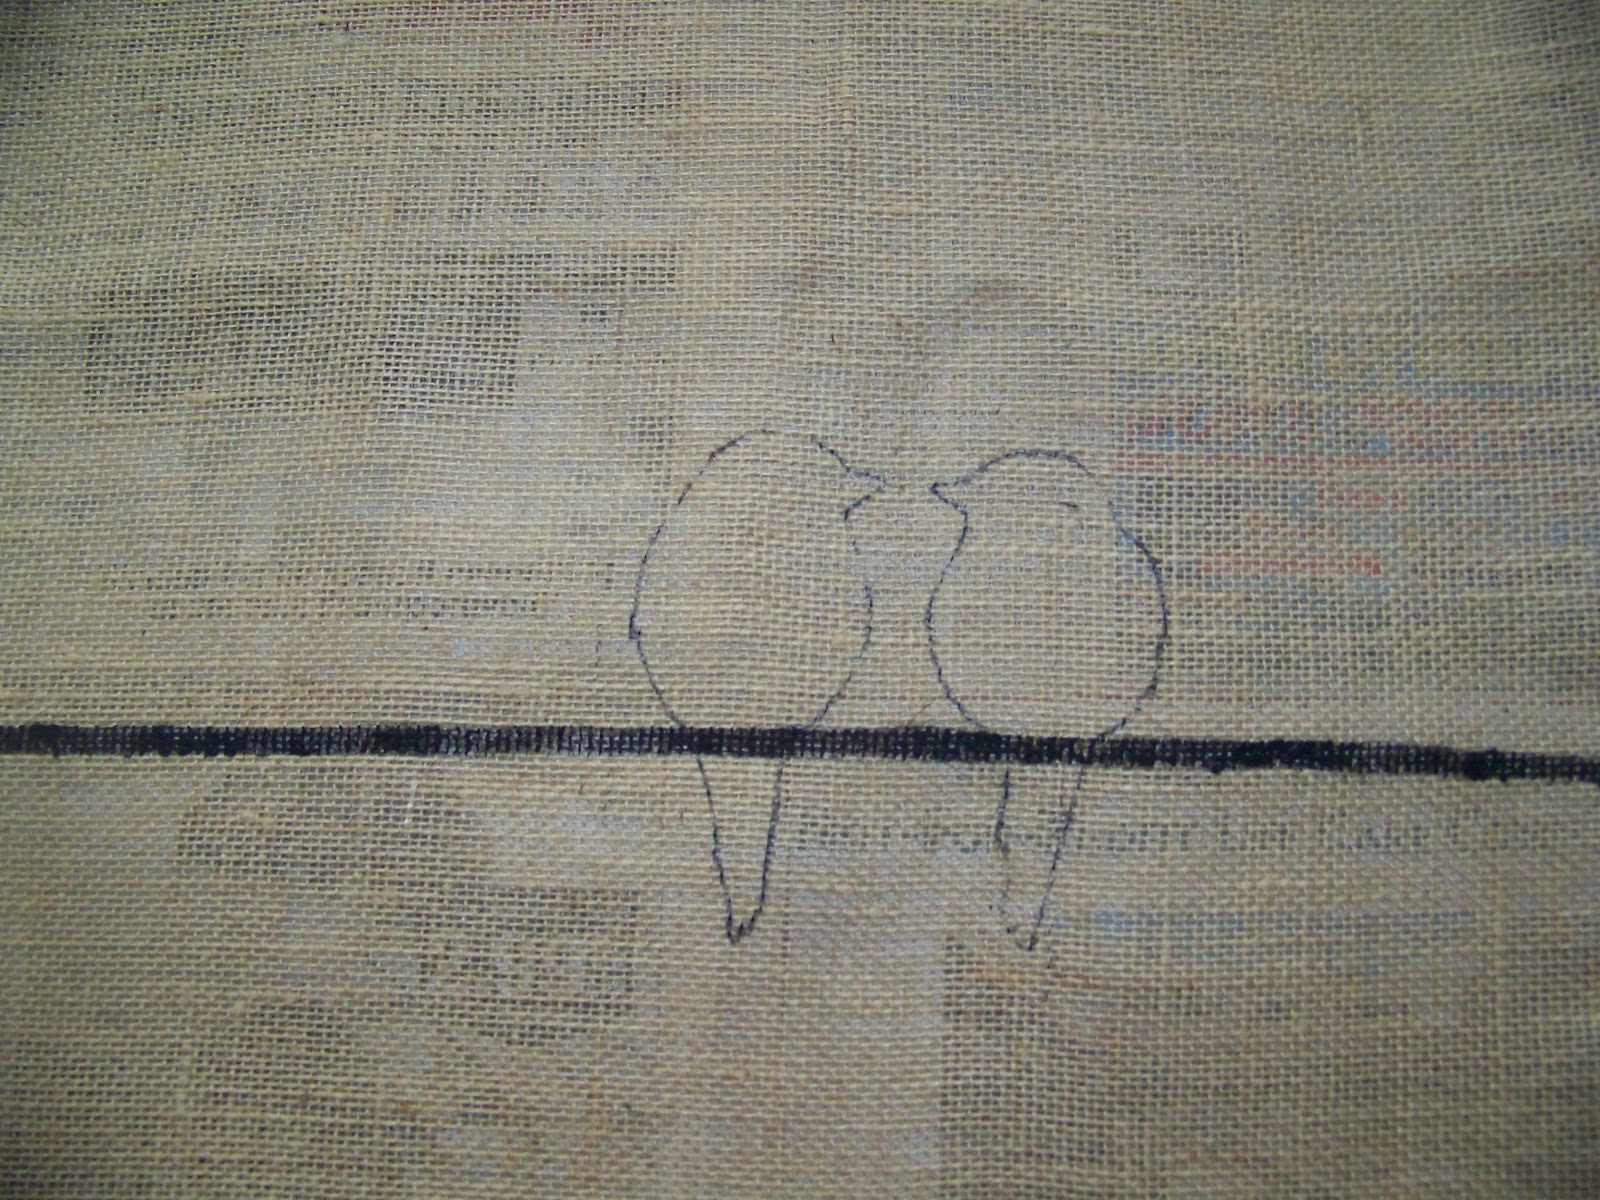
I wanted them slightly different so I just made the second bird a little shorter and fluffier when tracing and also changed the tail feathers slightly.


Painted inside the sharpie lines and let it dry.


I knew I wanted the words in the upper corner and was worried that they wouldn't be straight or positioned wrong so I went ahead and stapled the burlap to the canvases before painting the words on.


I used my silhouette to cut out the words on the contact paper.


I went back over the words with the black sharpie to touch up areas that were to light.


One more look at the finished project.


 Jeannie

Friday, October 26, 2012

New Dresser for Little Man


I am starting with a picture of the finished dresser because I am just about giddy with how it turned out.


Over a year ago I came across these two tall narrow dressers at a garage sale and snatched them up for $20 total.  Then they sat in the garage and collected junk on and around them until I finally got motivated to tackle this project.


Once I decided what we really needed for our family, furniture wise, I decided to sell one of the two dressers on craigslist.  This is the one I decided to keep for HB's room.


Yes, those are Winnie the Pooh handles, you are not seeing things.


If you can get beyond the paint job and the character hardware it has a wonderful shape to it.


I hauled the drawers outside and sanded, and sanded and sanded some more.  Let me tell you, had I known how hard it was going to be to remove every last bit of the paint in order to stain it, I probably would have chosen a different finish.  I also would not have taken this on in mid summer in Arizona. We'll chalk those decisions up to learning experiences.


Finally done sanding!


I used a Minwax dark walnut stain and love how they turned out.  The stain looks different on different parts of the drawers which turned out to be a happy surprise.


Now for the dresser body itself.  I knew I was going to be painting it so I wiped it down really good and then primed it with Kilz.

OK, I admit it, I forgot to take  a picture of the dresser during the painting process but you get the idea, paint, dry, sand with brown bag, paint, dry, sand edges to get that distressed look, finish with wipe on polyuerethane matte finish. I used Valspar, Ultra in Night View for the paint color.


Keep in mind that I painted the dresser for how the room is eventually going to look, not how it looks now.  In other words the next project for this room is new paint on the walls.


I also found some Spiderman wrapping paper and used spray adhesive to line all his drawers.  When shopping for liners I was drawn to the graphic print ones but this is for my three year old, not me so this is perfect for now and can always be changed later.


We got the hardware from Lowe's.


One final look because it makes me happy.


Jeannie


Wednesday, March 28, 2012

Craft Supply Storage...did I metion that it was free!

Something you should know about me, I have two addictions 1. Organizing, I love it!  Much to hubs dismay I can always find something to organize in our house so things are always moving and changing.


2. Is this Chai Tea mix.  I don't drink coffee or soda and I've always been an ice water girl who avoids caffeine.  That is, until I decided to try this tea and now I'm hooked.  I faithfully have a cup in the morning and usually a cup during HB's nap.  I wish I had thought up this craft earlier because I've already tossed a bunch into the recycle bin.


So, I didn't have anything specific in mind once I decided to save them but it hit me that I am in desperate need of organization on my craft room shelves and these were sitting empty on those same shelves waiting to be used.

Once I realized what purpose they could serve me I washed them out with a soapy sponge.  These are the same material as a pringles can so I think getting them to wet would ruin them.  I thought that I would be using scrapbook paper to cover them but look how pretty and shiny they are once the label is off.


Next step, labels!   Labels fall under the category of organizing and it makes me down right giddy to get to label something.  I already had some chalkboard vinyl that I got off of Pick Your Plum that was just sitting and waiting for the perfect project.  I used my silhouette to cut out a sheet of these oval labels and stuck them on. 

Please don't feel that you need a silhouette to do a project like this because I haven't had mine for very long and I traced and cut lots of projects like this by hand before I had one.


They are cute, but didn't look finished to me.  I took some nail heads that I bought at Lowe's, by the eye hooks, and used two sets of pliers to bend the nail part back and forth until it came off.


Hot glued those suckers on and called it good!


Now I need to buy some of those chalkboard markers I've read about.  Brighter colors and easier to write with.  I adore how this project turned out, it didn't cost me anything and gave me more excuses to drink my chai.