Pages

Wednesday, October 3, 2012

I Did What I Pinned Wednesday! 10/3

Are you on Pinterest?  If you are, you know it is very easy to pin all of these wonderful things that you are certain you are going to do and then never get around to them.  We thought it would be fun to start sharing some things that we have actually pinned and completed and let you know how it went and what we thought of it. 


First up, Jeannie with this gorgeous wall art. 
I cannot for the life of me find the original source for this picture so if you know where it is please let me know so I can give credit.


Ummmm not loving my version.  The colors I used aren't great and I think I should have used smaller petals and more of them.  I lived with it for a while....


Then one day I took all the petals off (I had just glued them on so it wasn't hard to do).


You can see that the lettering is still the green color but I cut out the lettering in vinyl with my silhouette and then sprayed over all of it with a gray I already had. I am much happier with this piece and still can't help but sing the song whenever I read it.

Jeannie
 
So, the first thing that came to my mind that I have made recently from Pinterest was this Apple-Cream Cheese Bundt Cake from Southern Living. I made it, took it to my husband's granny's house for family dinner, devoured it...but forgot to take a picture.
 
It was delicious! The only real "reviews" I have of this recipe is to note that the recipe calls for a 14 cup bundt pan. I only have a 10 cup, so I made a few giant muffins on the side to not overflow the bundt pan. Also note, don't let the praline frosting (it's delicious as well)cool too much before pouring it over the cake.
 
I will make this recipe again!
Click here follow me on Pinterest!
 
Amanda
 

Monday, October 1, 2012

Pumpkin Snickerdoodles


Well, it's fall. Any normal year, this is my favorite time of the year. In Alaska, we have a limited amount of time to enjoy the fall colors before winter gets here and I try to make the best of it. Alaskan scenery is gorgeous all the time, but I love when the leaves turn yellow up again the light blue sky. This time makes for some of the prettiest here in AK.

However...this year hasn't been cooperating. I believe I told you about the record snow fall last winter (beating out the record from the 1950's!)? Well, the record breaking winter was followed by one of the rainiest summers I have ever experienced, followed by a series of hurricane-force wind storms this fall. Winds were over 100 mph in the higher elevations. Thousands of people lost power which resulted in us losing our hot water heater for days. (Lucky for me my mom lives a few miles away and they had hot water!) I am blessed that the worst part of the damage for us was the lack of sleep and showers, others are still fixing the damages caused by the random Wednesday storm.

 These pictures are in our parent's backyard. Because the ground was so wet (record rainfall) when the wind started blowing at 80+mph the trees just tipped right over, pulling the root systems right out of the ground. The first picture is our dad, he is 6'3", so that shows you how tall those roots stood up.


THEN, this past Saturday, September 29th, that's right SEPTEMBER....I woke up to it snowing outside! I don't mean a little bit of frost on the ground that makes it appear to look like it snowed, I mean it was full on shaken snow-globe style snowing!


Determined that it is still technically fall (contrary to what the Alaska weather thinks), I made some yummy pumpkin snickerdoodles that I pinned from Six Sister Stuff. The snow eventually subsided, the sun came back out and there are minimal traces of snow left....for now.

Here is the recipe to make your house smell of wonderful fall:


Pumpkin Snickerdoodle
adapted from Six Sister Stuff blog

Ingredients:

For cookie dough
1/2 cup butter, room temperature
1/2 cup shortening
1 cup white sugar
1/2 cup light brown sugar
3/4 cup unsweetened pumpkin puree
1 large egg
3 1/4 cups flour
2 tsp baking powder
1 tsp baking soda
1/2 tsp salt
1/2 tsp cinnamon

To roll the dough in:
1/2 cup sugar
1 Tablespoon cinnamon
1/2 tsp ground ginger
Dash of nutmeg

-Cream together butter, shortening, and sugars.
-Add egg and pumpkin puree, mix until blended.
-Add in flour, baking powder, baking soda, salt & cinnamon, mix until combined.
-Chill dough. (30 minutes in fridge or 10 minutes in freezer).
-Meanwhile, combine sugar, cinnamon and spices of your choice in a bowl.
-Scoop dough using cookie scoop of your choice, roll the dough in the cinnamon/sugar mixture and place on cookie sheet.
-Bake for 7-9 minutes.
Cool and enjoy!!

What do you bake to make your home smell like fall?

-Amanda


Friday, September 21, 2012

Oil Pan Chalkboard Picture Schedule

Let me start by explaining something.  I thought hubs and I were being super smart by saving all of our pictures for the last four years to an external hard drive.  I thought it was smart, until our hard drive decided to stop working and is now holding all of those photo's hostage until I can find someone to hopefully save them...praying its possible.

I say this to explain why I have no photo's of the process of this project.  I took them, they are being held hostage.  Luckily its super easy and I should be able to walk you through the steps.


Our sweet, sweet little man is very routine oriented and doesn't do well with change that is thrown on him.  We have learned this and try to help him out as much as possible.  He is also a very visual kid which is why this project was born.  It was inspired by this pin.

I picked up an oil pan at the auto supply store for about $10

Primed it by using a small sponge roller to roll on Kilz primer.


After the Kilz dried I rolled on this chalkboard paint that I picked up at Walmart for about $10. I have lots left for other projects.


I LOVE teacher stores so I ran to one and bought the cutouts for the Months and Days. I had them laminated and used E6000 to glue magnets to the back.


I googled free clip art of all of the usual things we have in our daily routines. Breakfast, school, free play, daddy coming home, snack, library, church, ect.  Because of having joint custody of Bree I included a picture of her so he can know what days he can expect to see her and what days he won't. 

 I saved the pictures and clip art to a Word document and sized them all to be about two inches.  Printed them, had them laminated and glued the magnets to the back.


I keep the days of the week in the piano bench right by the calendar as well as the pictures that we aren't using that day.


I keep the numbers for the day of the month in this cute little basket I picked up from pickyourplum.com so they stay in order.


The way the oil pan is shaped it has a perfect little ledge at the bottom to hold the chalk.


Right now the chalk is just for notes to little man or he likes to practice his letters on here as well.  I like the versatility it has for us.  If we get to a point where we don't need a calendar like this we can use it as a chalkboard or make these fabric letters and add a magnets to the back.


One more look of the final product. 


       xoxox Jeannie


Tuesday, September 18, 2012

Picture Frame Art Display

My sister-in-law came into town last week and we were discussing Pinterest crafts. We both had pinned this idea for displaying art: Little Nanny Goat


I have wanting to do something cute to display my boys' drawings. Right now, it's just scribbles but I love their scribbles and hanging them on the wall with scotch tape just doesn't do them justice! :)

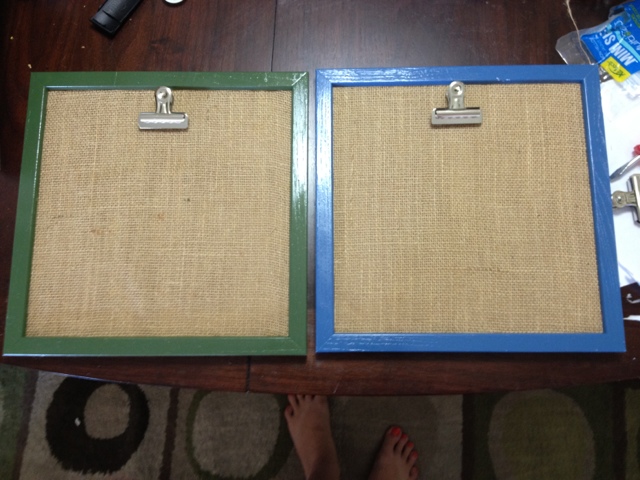
So, off to Goodwill we went! We bought 3 frames from Goodwill ranging from $1.99 to $3.99. I like the ones with a lot of detail. Then we bought some from Walmart...my boys were playing with them, they got broken...back to Goodwill I went. I bought three more frames for $1.99 each. Two of them were still in the packages. Score!  (and I also got a brand new dryer erase board in the package for $1.99. Double score! And I have the perfect project for a later date!) I had a yard of burlap that I got from JoAnn's for $3.99 and we went to Walmart and got spray paint. My frames will be hanging in the boys' playroom at the new house so I wanted bright colors. I also picked up primer and sander. The clips we bought at Walmart for $1.88 for a two pack.

Supplies

First, take the frames apart. Take out the glass and backing so it is just the frame itself. I sanded the frames a little bit and put a coat of primer on. 

Frames with the primer

While the primer was drying, I used my hot glue gun (Caution: Hot glue guns...they really are hot and I often burn myself!) and wrapped the backing of the frames in burlap gluing around the edges. Makes sure you pull the burlap tight so there are no bumps. 


Back to the frames...do a coat of whatever color you wish to use. You may have to do two coats depending on the color. I did two coats of the green. (the other red and blue frame I did when we bought all the supplies last week...I just didn't get pictures of it)

Frames with the colors

After the frames were gone drying, I put the burlap covered backing into the frames and attached the clip. I waited to attach the clips until they were back in the frame to make sure I had them even with how they lay in the frames. 
My Sister-In-Law's Frames
Our Playroom Frames
Such a cute and inexpensive way to display art! And if burlap isn't your thing, use colorful scrapbooking paper!

`

Monday, September 17, 2012

"Kryptonite" Rice Krispies


The story behind the name of these addictive little treats:
I learned to make these rice krispie treats from my husband's grandmother. (turns out it is a Nestle recipe, but I still give Granny the credit) I started making them for most get togethers, including the ones with my side of the family.

My sisters had the same reaction to these ridiculously good rice krispies that I did when I first had them and now they are demanded at family get togethers.

Now, the real reason I call them "kryptonite" is that even my sister, Kristy (you know the one that eats perfectly, works out daily), will cave and eat too many of these. I will refer to them as "Kristy's Kryptonite" forever now, and she agreed with me when I sent her a picture of making them.

Last time I made these for two of my three sisters was this summer for the cabin trip over the fourth of July. They were both visiting with their families and we went to my parent's cabin. I made a 1.5 batch of the recipe below (a 15x10 pan). Before the end of the second day, Jeannie was hiding the rest of them from everyone else so she didn't have to share! (We think Jeannie has a hoarding food problem, but that's another day another post...)

If you'd like to make these, it's super simple!!

Here's what you'll need:

1 cup light Karo Syrup
1 cup white sugar
1 cup smooth peanut butter (I normally make this a slightly heaping cup)
6 cups rice krispie cereal
1 1/4 cup milk chocolate chips
1 1/4 cup butterscotch chips

Here's how you make 'em:

Grease a 13x9" pan and set aside.
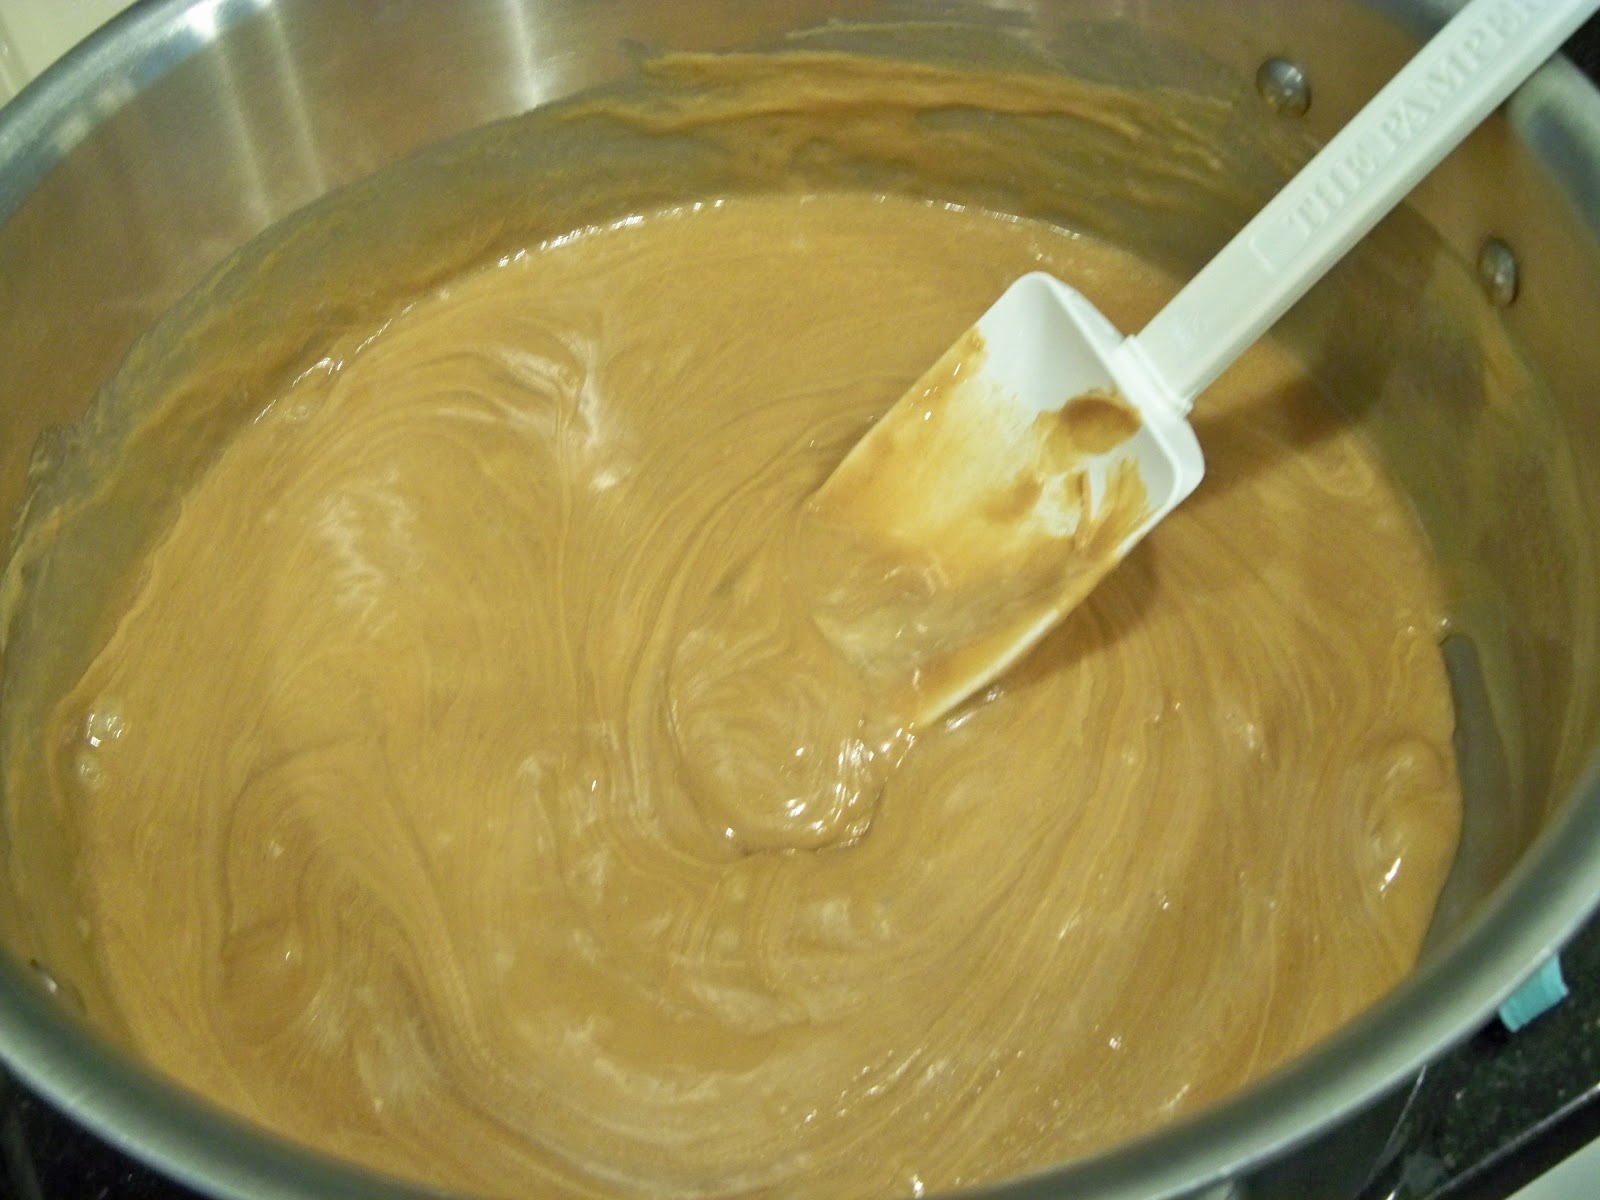
Put sugar and karo syrup on medium heat and cook until bubbling.


Remove sugar mix from heat when bubbling like the picture, and add the peanut butter. Stir this until mixed, and add the rice krispie cereal. Mix cereal in until well combined. Carefully pour this mix into the greased 13x9 pan and press out. (You may want to spray a little cooking spray on your fingers before doing this part, it will help keep the mixture from sticking to your hands) If you do not want to use your hands for this, just use a spatula to spread the mixture out in the pan.


Then is a microwaveable bowl, heat the chips until melted, careful not to burn the chocolate. (I would heat for one minute, then stir. If needed microwave for 30 seconds at a time and stir in between until melted. Due to the kitchen remodel that started last year, I do not have a microwave. So, I use a double boiler method to melt my chips. And yes, I know it is crazy to not own a microwave in 2012...)


Spread the chocolate mixture over the top of the rice krispies and allow to set. WARNING: The chocolate will take some time to set up, especially if it's warm in your house. You can toss these in the fridge or freezer for a bit to set the chocolate but it's best if you don't leave them in there too long or they will become rock hard.


Cut them up and Enjoy!!

What is your "go to" dessert? Am I the only person who has dessert recipes memorized?

-Amanda

Wednesday, September 12, 2012

D is for Duck..F is for Fish, Bathroom Decor

So, I've been trying to think of crafts to do that I have the space to do it and it's inexpensive. In my little guys' bathroom, I had hung up some pictures that were in their bedroom at our old house. Their shower curtain has the alphabet with the coordinating animal. The theme  of the pictures went.. the colors did not so I found some inspiration on Pinterest (of course!) and decided to give it a try. Here is my inspiration (although hers is made of fabric, I used scrapbooking paper):  Giraffe Silhouette


 I went to Michael's and bought some scrapbooking paper. I liked the blue paper because it looks like water drops. Perfect for a bathroom. I had decided to do a fish and a duck since those are two of the ones on my boys' bathroom curtain. $.99 for 2 pieces and $.50 for the other two.


So, all you do is Google ______(whatever you are wishing to have) silhouettes and click images. There are tons and tons of options. I picked the ones that looked simple enough without a ton of detail since I wasn't sure how'd that look with the paper. Also, I have seen this idea for girls' bedrooms with princesses. Maybe someday I'll get to do princesses but for now, we have a fish and a duck. I was thinking trucks and cars would work too if that was your theme.

Print the silhouette. Currently my printer needs reprogrammed onto my computer and my CD is in storage so, I traced it from the computer screen. Worked just as good. 

I attached the paper with the silhouette onto the scrapbooking paper and cut it out. Then used scrapbooking adhesive to attach is to the backdrop paper.


 I bought the sticker letters from the craft store but you could write them. (my handwriting isn't nearly nice enough for that) or print them out.


Ta-da! Easy. Inexpensive. Cute.

- Sabrina 


Friday, September 7, 2012

Pirate Night!

I love having theme nights with my family.  I love putting it all together and then surprising them with it, on an otherwise ordinary night.  A while back we had pirate night and the kids loved it!


I gathered supplies

Swords
Pirate books from the library
pirate movies
eye patches
bandannas
treasure maps
gold coins (not pictured)

We started our evening getting all our pirate gear on. 
Fierce aren't they.

Then we made Personal Pan Pirate Pizzas (just homemade pizza's but the name made it more special).

While the pizza cooked hubs read the pirate books.


Chow time!


 We of course had to have a sword fight or two.

Then each kid got a treasure map that I made out of brown bags. I tore a pice from the bag, got it wet, crumpled it up and then once they were dry I wrote out a map leading each of them to a bag of treasure (chocolate gold coins).  I, of course, was far to wrapped up in the excitement to get pictures of this part....sorry.

Finally we sat down and watched Peter Pan together.

All this was done and cleaned up and they were in bed on time so hubs and I could finish off those gold coins and hang out.

Family theme nights are supposed to be fun so don't stress about the details.  Clearly I didn't because I am just now noticing that HB didn't have pants on the entire evening. 

What about you?  Have you guys ever done any theme nights?  What are your favorites?  What are your kids favorites?


xoxox Jeannie