Pages

Showing posts with label Decor. Show all posts

Wednesday, February 13, 2013

Chalkboard bottles


With the holidays passed, we seemed to have a lot of wine and beer bottles laying around. I cleaned them out and had them in a cabinet because I knew they'd come in handy. While I was painting my chalkboard frame, I figured what better time then to paint the bottles the same.

I let the bottles soak in water to get the labels off. They mostly all came off besides a couple left some sticky residue that wiped right off. I let them sit out to dry while I did some other stuff. 


I used the same roller as I was using for my picture frame chalkboard and did three coats on each bottle. Because they are dark glass, they didn't take as many coats but if you have a clear glass, it may require more. Make sure the paint is completely dry in between coats or it'll clump and streak.

After they were all dry, I decided LOVE is good to write on them since Valentines Day is next month.
A home above our kitchen cabinet is a perfect home for it since its pretty bare up there!
Do you have lots of bottles floating around after the holidays? What a great, inexpensive way to repurpose them.


Friday, November 30, 2012

DIY Canvas Quote

My boys' bedroom walls are bare. I have tons of ideas I want to do like a fabric tree or tissue paper Pom poms from the ceiling like in their original nursery but I know soon they will be out of theirs cribs :( and into toddler beds which means big boy bedding. (Makes me sad even thinking about toddler beds. What happened to my babies?) And by then, the room decor will change.

I decided a canvas would be cute and I happened to have all the supplies on hand. I painted a canvas with some orange acrylic paint. I did two coats.

For the quote...you see, 19 months ago, Jeannie and Amanda came to meet my boys. Amanda is a great photographer and took some newborn pictures for me. This is one of them:

Perfect, right? :)

Now, if you are fancy and have a circut or silhouette  obviously use those for your stickers...or if you are like me and have that on your wish list *hint,hint*, you can stickers. I have a million scrapbooking stickers and they worked perfect. To make sure I was going in a straight line, I used a piece of paper as my guide.


All done with the quote...then I went outside and spray painted it with blue spray paint. After it dried, pull off the letters and ta-da! Simple. Quick. Inexpensive. And so cute! The walls are still pretty bare but it is a work in progress! 


-Sabrina

Friday, November 16, 2012

Burlap Art


Don't you love it?!  The walls in our half bath were pretty empty and it's always bothered me.


Hobby Lobby had a set of two of these canvases for around seven dollars.  I didn't really have a plan when I bought them but figured one out pretty quick.


I had some burlap already because I stocked up before it was officially fall season when it would be hard to find.  I am a huge fan of this method to cut burlap when you need a straight line.  Measure to where you want it cut, snip it about an inch,


pull one of the threads in that snip and start pulling.  You will be able to pull that one thread all the way out


leaving you a line as a guide so you can cut with scissors and be sure its straight.


I cut my burlap a little bigger than the canvases.
 

I laid out four pieces of contact paper leaving a small line open where I wanted to paint the wire.  I used fabric paint for this but because the paint doesn't need to be flexible when dry I probably could have used anything.


Here it is with the wire done.


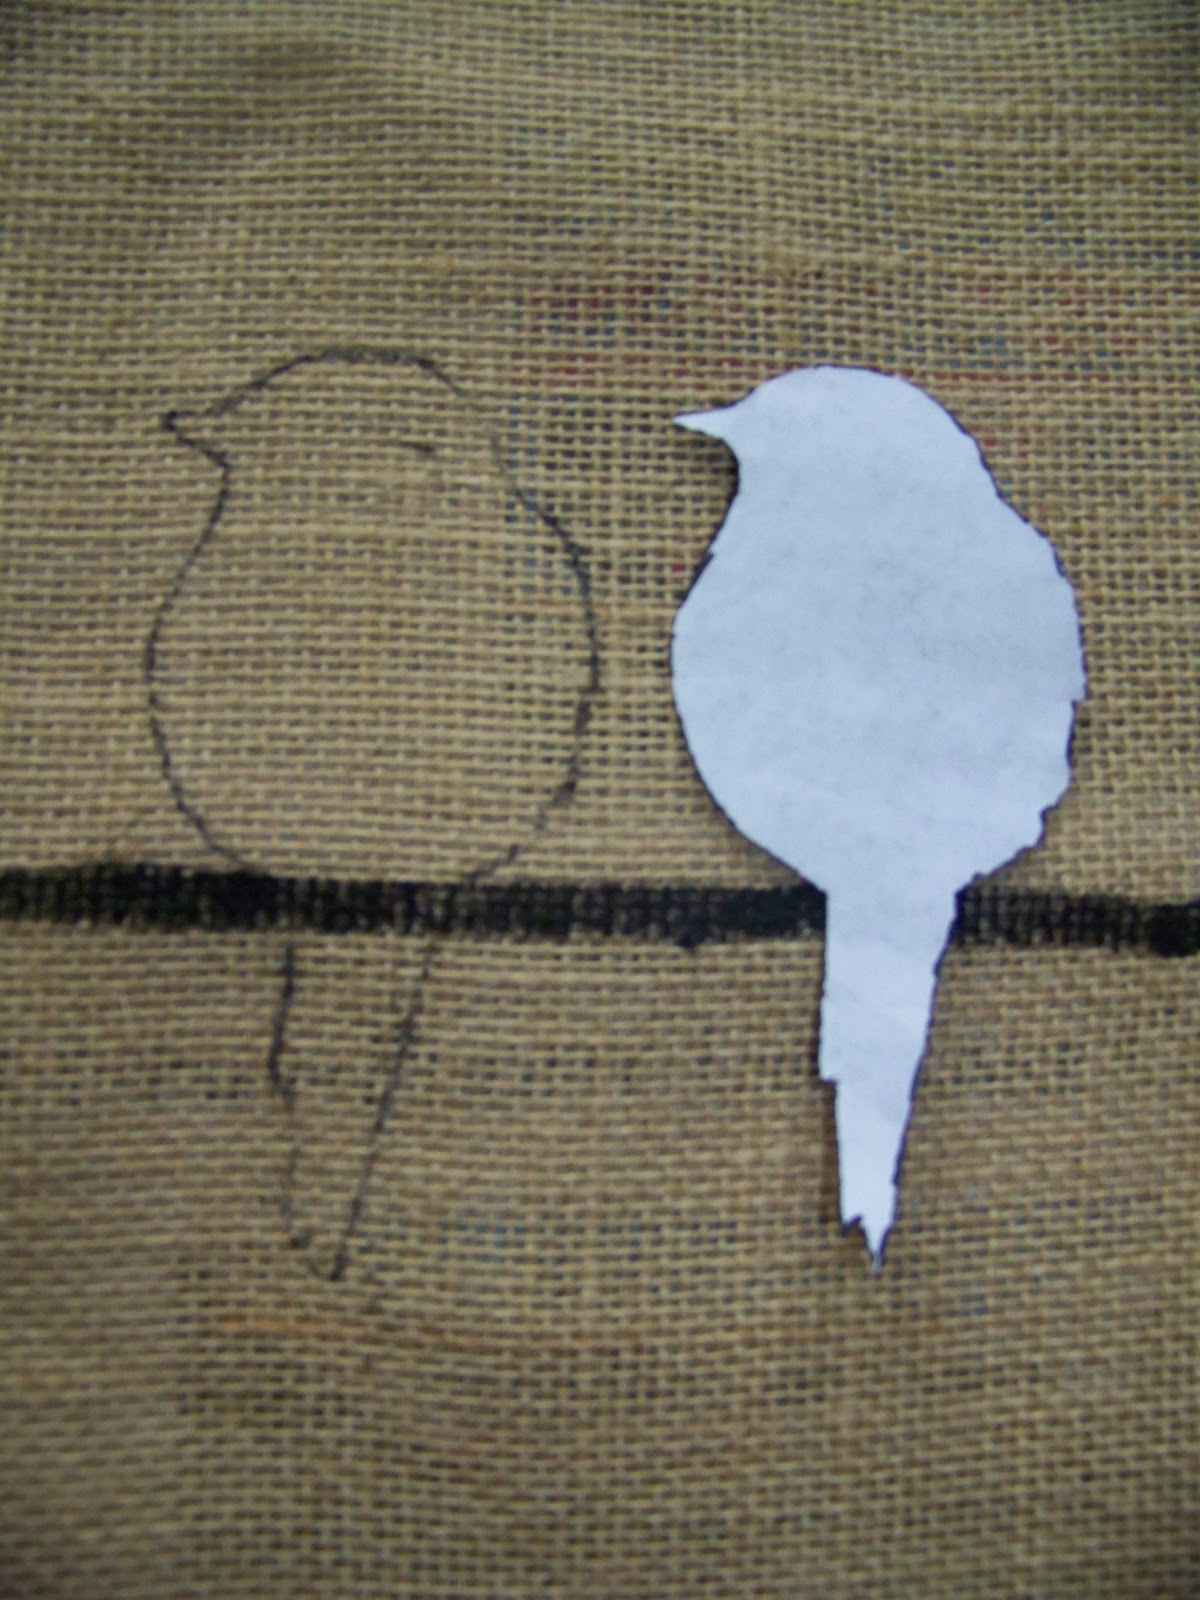
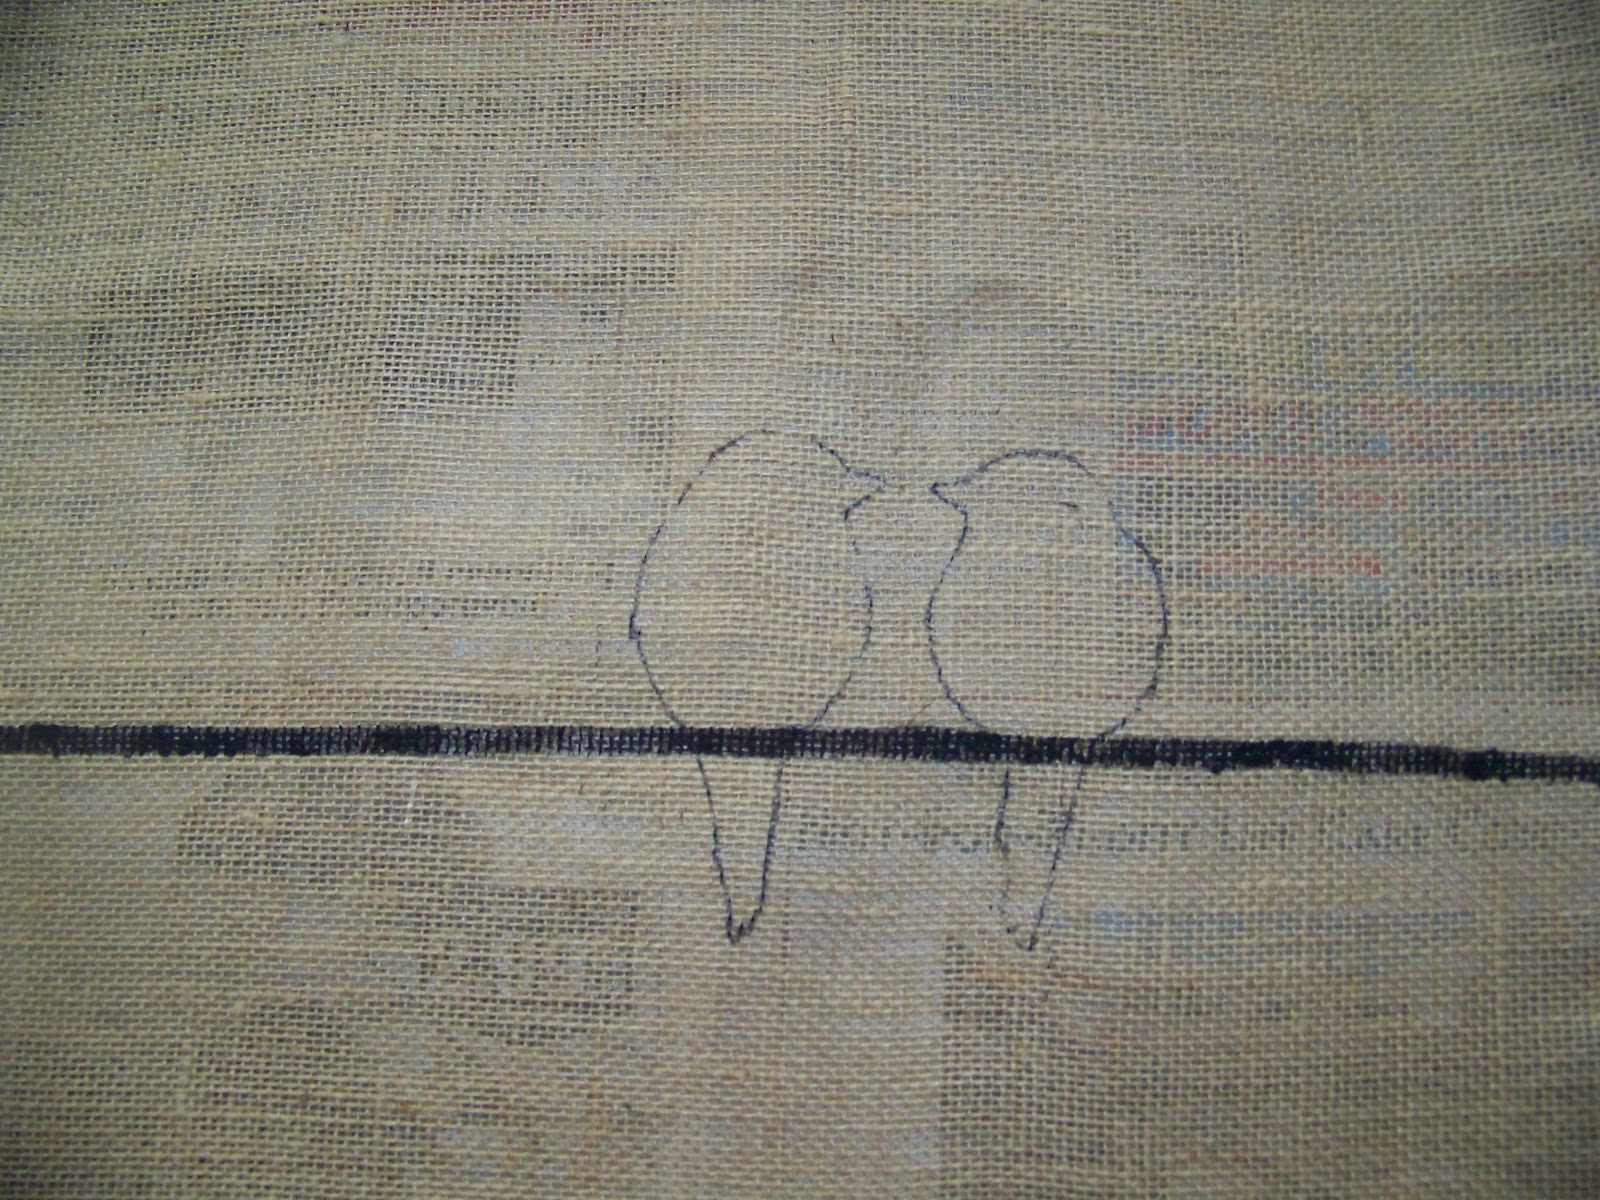
I found a bird online that I liked and printed and traced it onto paper.  I used a sharpie to trace around my stencil.


I wanted them slightly different so I just made the second bird a little shorter and fluffier when tracing and also changed the tail feathers slightly.


Painted inside the sharpie lines and let it dry.


I knew I wanted the words in the upper corner and was worried that they wouldn't be straight or positioned wrong so I went ahead and stapled the burlap to the canvases before painting the words on.


I used my silhouette to cut out the words on the contact paper.


I went back over the words with the black sharpie to touch up areas that were to light.


One more look at the finished project.


 Jeannie

Friday, October 26, 2012

New Dresser for Little Man


I am starting with a picture of the finished dresser because I am just about giddy with how it turned out.


Over a year ago I came across these two tall narrow dressers at a garage sale and snatched them up for $20 total.  Then they sat in the garage and collected junk on and around them until I finally got motivated to tackle this project.


Once I decided what we really needed for our family, furniture wise, I decided to sell one of the two dressers on craigslist.  This is the one I decided to keep for HB's room.


Yes, those are Winnie the Pooh handles, you are not seeing things.


If you can get beyond the paint job and the character hardware it has a wonderful shape to it.


I hauled the drawers outside and sanded, and sanded and sanded some more.  Let me tell you, had I known how hard it was going to be to remove every last bit of the paint in order to stain it, I probably would have chosen a different finish.  I also would not have taken this on in mid summer in Arizona. We'll chalk those decisions up to learning experiences.


Finally done sanding!


I used a Minwax dark walnut stain and love how they turned out.  The stain looks different on different parts of the drawers which turned out to be a happy surprise.


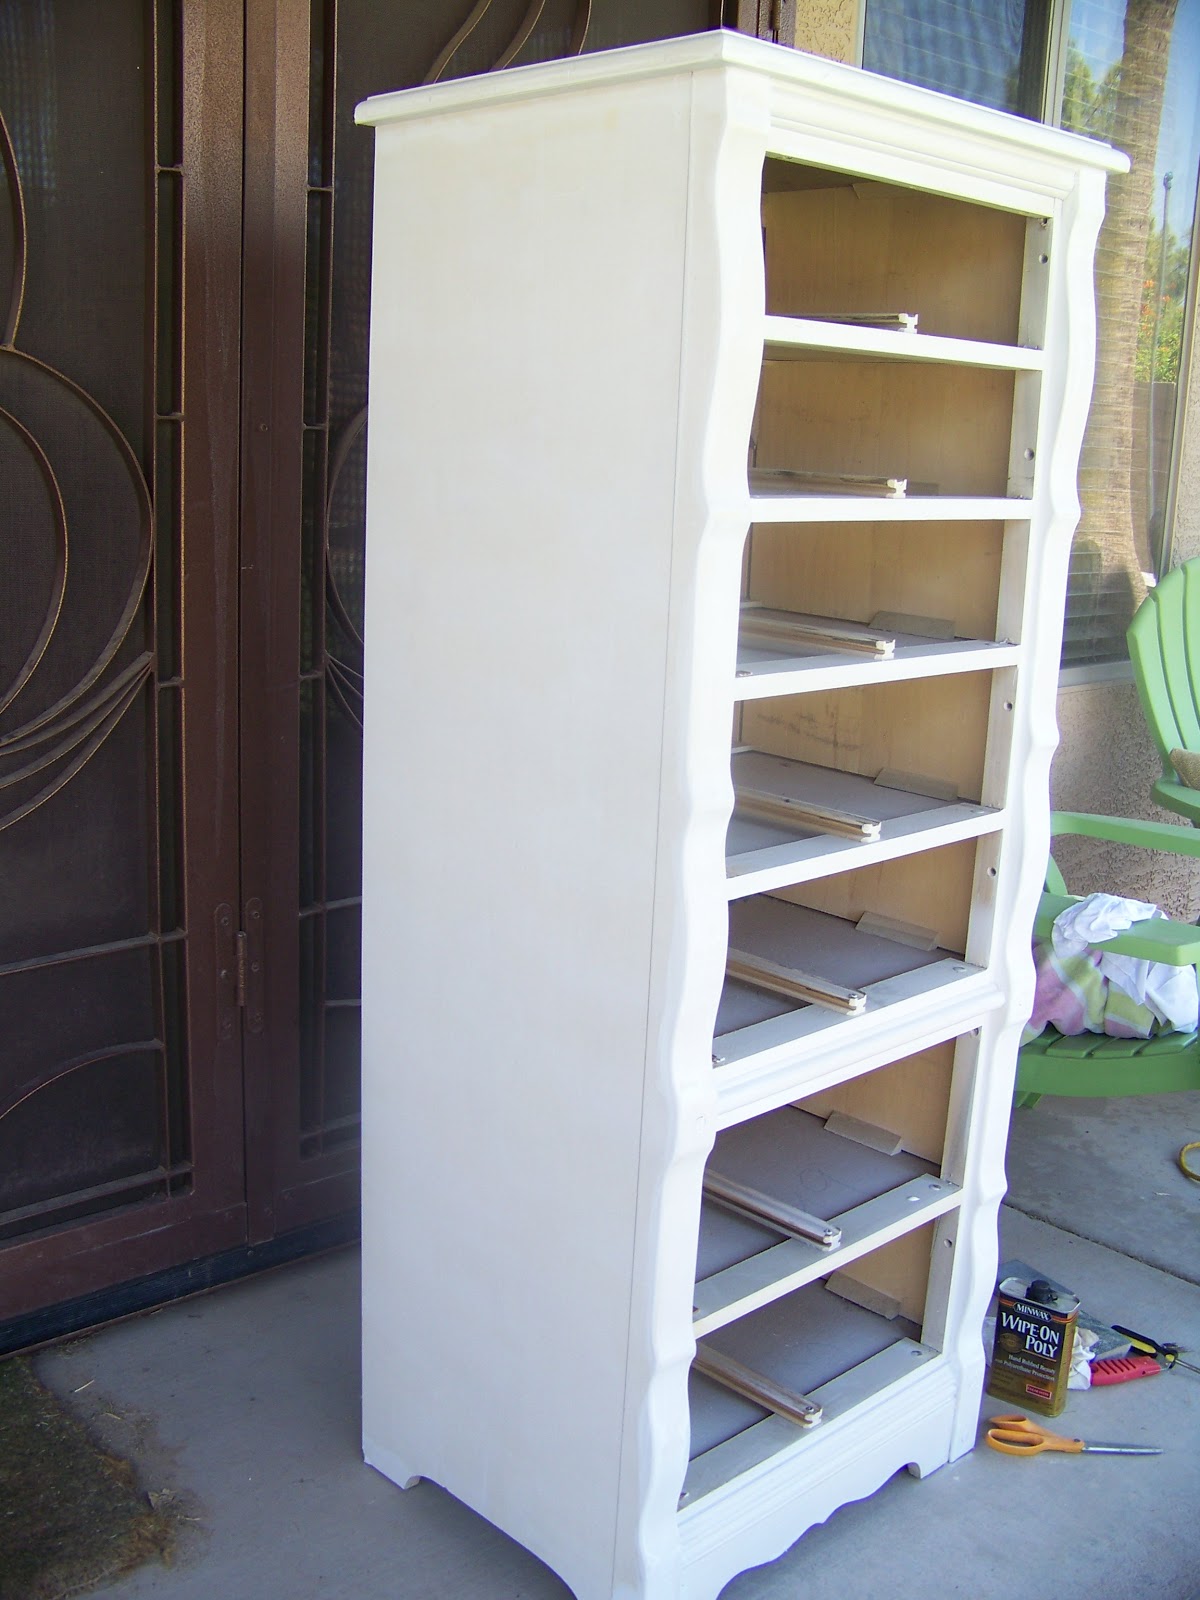
Now for the dresser body itself.  I knew I was going to be painting it so I wiped it down really good and then primed it with Kilz.

OK, I admit it, I forgot to take  a picture of the dresser during the painting process but you get the idea, paint, dry, sand with brown bag, paint, dry, sand edges to get that distressed look, finish with wipe on polyuerethane matte finish. I used Valspar, Ultra in Night View for the paint color.


Keep in mind that I painted the dresser for how the room is eventually going to look, not how it looks now.  In other words the next project for this room is new paint on the walls.


I also found some Spiderman wrapping paper and used spray adhesive to line all his drawers.  When shopping for liners I was drawn to the graphic print ones but this is for my three year old, not me so this is perfect for now and can always be changed later.


We got the hardware from Lowe's.


One final look because it makes me happy.


Jeannie


Tuesday, September 18, 2012

Picture Frame Art Display
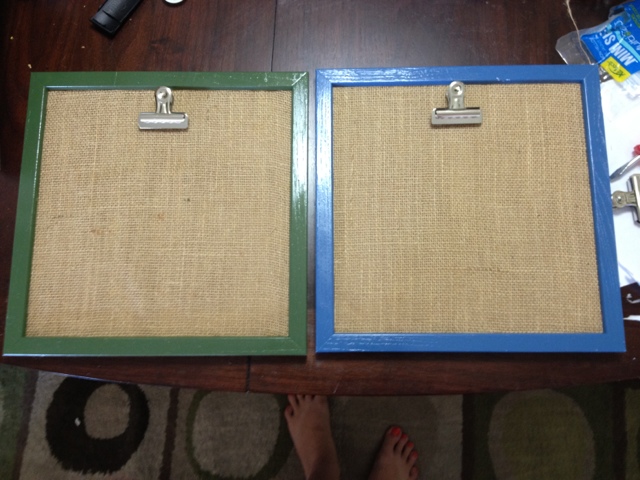
My sister-in-law came into town last week and we were discussing Pinterest crafts. We both had pinned this idea for displaying art: Little Nanny Goat


I have wanting to do something cute to display my boys' drawings. Right now, it's just scribbles but I love their scribbles and hanging them on the wall with scotch tape just doesn't do them justice! :)

So, off to Goodwill we went! We bought 3 frames from Goodwill ranging from $1.99 to $3.99. I like the ones with a lot of detail. Then we bought some from Walmart...my boys were playing with them, they got broken...back to Goodwill I went. I bought three more frames for $1.99 each. Two of them were still in the packages. Score!  (and I also got a brand new dryer erase board in the package for $1.99. Double score! And I have the perfect project for a later date!) I had a yard of burlap that I got from JoAnn's for $3.99 and we went to Walmart and got spray paint. My frames will be hanging in the boys' playroom at the new house so I wanted bright colors. I also picked up primer and sander. The clips we bought at Walmart for $1.88 for a two pack.

Supplies

First, take the frames apart. Take out the glass and backing so it is just the frame itself. I sanded the frames a little bit and put a coat of primer on. 

Frames with the primer

While the primer was drying, I used my hot glue gun (Caution: Hot glue guns...they really are hot and I often burn myself!) and wrapped the backing of the frames in burlap gluing around the edges. Makes sure you pull the burlap tight so there are no bumps. 


Back to the frames...do a coat of whatever color you wish to use. You may have to do two coats depending on the color. I did two coats of the green. (the other red and blue frame I did when we bought all the supplies last week...I just didn't get pictures of it)

Frames with the colors

After the frames were gone drying, I put the burlap covered backing into the frames and attached the clip. I waited to attach the clips until they were back in the frame to make sure I had them even with how they lay in the frames. 
My Sister-In-Law's Frames
Our Playroom Frames
Such a cute and inexpensive way to display art! And if burlap isn't your thing, use colorful scrapbooking paper!

`